
A Three Photo Test for AI Background Removal
Before you run a whole folder through an AI background remover, put three photos aside for a trial. Pick a product with a firm outline, a portrait with loose hair, and an object with a handle or a clear surface. Feed the same files to each tool and save the free exports. Then open them in a draft of the listing, slide, or graphic you are making. That is where you find out whether the download is large enough and whether the edge holds up against the color you chose.
Start with three photos that expose different problems
Choose the test photos with their destination in mind. A product listing on white and a game tile on an online casino site such as lumaslot casino can put the same cutout against very different colors. If you make images for a shop and a newsletter, for instance, pull up a draft of each. A border you barely see on the shop page might be easy to spot against the newsletter's colored header.
Use the product photo to check a sharp edge, such as the corner of a box. On the portrait, pick a small patch of hair you can find again in every export. For the third photo, try a mug with a visible opening inside its handle. A glass is a good substitute if clear objects come up more often in your work.
| Test image | What to inspect | Common defect |
|---|---|---|
| Product shot | Corners and the base | A chipped corner |
| Portrait | Loose hairs near the temple | A solid clump |
| Mug with a handle | The inside of the handle | A filled gap |
| Clear object as an alternative third photo | The rim and clear area | An opaque patch |
Save each tool's first pass before you touch it up. A clean corner you restored by hand tells you little about how much work the next twenty corners will take. Give the exports names you can sort by photo and tool. That makes it easy to open all the portraits together or go back to the original if an edge looks odd.
Compare what free online tools let you download
When you use a free online AI tool to remove the background from an image, follow it through to the download screen. A full-size preview can sit next to a smaller free export. Open the downloaded file and look up its width and height in your editor or file viewer. Check for a watermark on the subject as well as in the corners. Record the dimensions of the version you were actually able to save.
| Export check | What to do | Why it matters |
|---|---|---|
| Transparency | Place the cutout over a colored layer | Solid white can look transparent in a preview |
| Pixel dimensions | Compare the download with the space it will fill | A small export can blur when enlarged |
| Visible marks | Scan the corners and the subject | A mark may show after export |
| File format | Open the download in your usual editor | Compatibility matters for the next step |
Match the file to a real use. A small staff photo may have plenty of pixels for a directory and too few for a wide header. Place the image at the size you plan to publish before deciding how much the export limit matters. For transparency, add a colored layer underneath and check that the color shows through both around the object and inside any open gaps.
The useful result is the file you can place in your own layout.
Inspect the edges where the image will appear
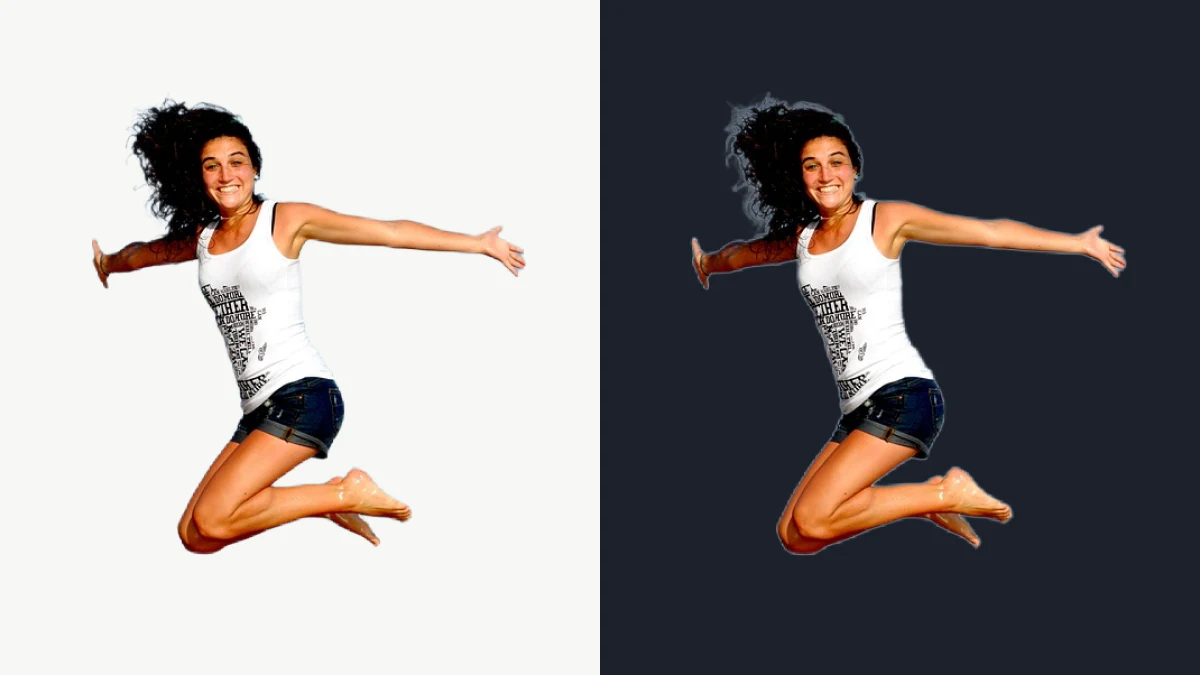
View the same cutout on a pale background and a dark one. A trace of the old white wall can blend into a light page and show up as a bright line on a dark card. The reverse can happen with a dark shadow around a product. Once you have seen both versions, set the background to the color you plan to publish.
Zoom in to see exactly where a cut went wrong, then return to the final display size. A rough spot on a sleeve may disappear in a small thumbnail. A filled-in handle can make a mug look wrong at any size. Use the same set of checks on every download so a strong first impression does not decide the whole comparison.
- Look for a thin line from the old background.
- Check whether a handle or loop has an open center.
- Inspect labels and small marks near the edge.
- See whether the shadow still makes sense in the layout.
- Review the image at the size readers will see.
Keep the original portrait open beside its cutout. A tool may drop a few loose hairs and still leave a convincing outline for a profile photo. When part of an ear or cheek is gone, you can see where the edge needs repair. Note the spot and move on to the same spot in the next export.
Decide which edits are worth repeating
Use your test results to choose a tool for the next group of photos. One option may handle the portraits well while another does a cleaner job on boxes and bottles. Try repairing a sample edge before you commit to the batch. If you spend time on the same spot in several files, factor that repair into the time you set aside for the job.
A fix that takes seconds on one photo can take up an afternoon across a large catalog.
Save a short record alongside the trial files. Write down the tool, export size, and background color you used for each comparison. Add a note about any edge you repaired. The next time you compare AI tools to remove a background from an image, those files give you a reference you can open in the same layout.
- Keep the three original photos in one folder.
- Save the export settings beside the samples.
- Note which tool gave the best result for each photo.
- Record any edge repairs you had to make.
- Retest when your image type or final layout changes.
Start with three photos that have a job waiting for them. Compare the free downloads in that setting and pay attention to what you would have to fix by hand. Once the files are large enough and the edges look right at the size people will see, move on to the rest of the batch. Save the samples so your next decision begins with a file you already trust.